Rockford Industrial Area Revival Project - Moderated newsgroup > Motor Drives and Controls
> Machesney Park
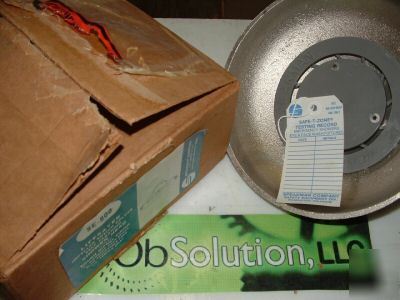
> Speakman se-800 lifesaver impeller action shower head
Speakman se-800 lifesaver impeller action shower head
Speakman se-800 lifesaver impeller action shower head
From: Paul Valentine
Subject Speakman se-800 lifesaver impeller action shower head
SPEAKMAN SE-800 LIFESAVER IMPELLER ACTION SHOWER HEAD
ALL ITEMS INCLUDED ARE PICTURED
SPEAKMAN COMPANY SAFETY PRODUCTS
SE-238-SR Installation, Maintenance, Operation Instructions
® EMERGENCY RECESSED WALL SHOWER
Emergency deluge shower unit with wall recessed activator. Shower is supplied with a 1†NPTF stay-open full flow ball valve that is activated by pull handle that is recessed inside wall cabinet.
SHOWER HEAD: Brass, 8†Diameter Polished Chrome Plated.
CABINET: 18 Gauge (.048 thk.) Stainless Steel
VALVE: 1†NPT Female Brass, Chrome-Plated. Full Flow Stay-Open Ball Valve.
ACTIVATOR: Stainless Steel Lever with Black Plastic Rotating Handle.
PIPING: 1†IPS Steel Piping & Unions.
EMERGENCY SIGN: 7-7/8†x 12†Plastic Wall Sign.
1. At desired location of shower. Cut 9-1/4†X 17-1/16†rough in opening in wall as shown in fig. 1. Please make note of piping & valve orientation as seen in fig. 2 before moving forward with any piping installation.
2. Be sure that all water supplies are shut off before beginning any piping installation.
20GPM (20 GPM Flow Control) â—Š SSH (Stainless Steel Shower Head)
30GPM (30 GPM Flow Control) â—Š FLW (Flow Switch)
3. Install supply piping (supplied by others) and valve & union assembly (supplied) as shown in fig. 2. Make sure that before
unions are tightened for the last time, that the stainless steel lever handle is as close to perpendicular to the finished
wall as possible. Use pipe dope or thread sealant on all pipe joint connections (not union connections).
4. Once piping is complete, and it is oriented correctly per the rough in dimensions specified. Position the stainless steel
cabinets in wall as shown in fig. 3, making sure the lever handle is in the half-open (horizontal) position. This will allow
the handle to fit through the slot on the cover of the cabinet.
5. At this point be sure to move the lever handle to the on & off positions to make sure it travels uninterrupted.
If handle moves freely inside slot in cover. Secure cabinet to wall using supplied wall anchors.
If handle hits or drags in slot. Loosen union connections and adjust location of valve until it is correct.
6. Assemble black plastic rotating handle to stainless steel lever handle as shown in fig. 4.
Assemble showerhead to 1†pipe as shown in fig. 5. Make note that ANSI specifies that showerhead must be 82â€-
96†from the surface on which the user stands.
10. Test unit to verify performance.
The shower is activated by pulling/pushing the recessed handle in the downward direction to the full open position. Once the
valve is activated the head will continue to discharge water until the valve is manually closed. The unit is shut off by
pulling/pushing the recessed handle in the upward direction to the complete off position.
The American National Standards Institute (ANSI) states that all safety emergency equipment shall be activated on a weekly
basis to flush the line and verify proper operation. Speakman Company furnishes a testing record tag (91-0635) with each
unit. On this tag the date of inspection and the inspector’s initials should be noted.
Should you need to repair components behind the wall (valve, lever handle, etc.), the access panel is removed by following
1. Shut off water supply before doing any repair to this unit.
2. Position lever handle in the half-open (horizontal) position, and remove black plastic rotating handle from lever handle.
3. Remove the (4) screws that attach the cover panel to the cabinet, and slide the cover panel off. This will give you full
access to valve and lever handle inside the wall.
4. Once repair is made follow above instructions in reverse to reassemble handle and panel cover.
supply back on once repairs are final.
Reference additional technical sheets (supplied) for information on the SE-800
WARNING: Use only genuine Speakman parts when repairing or replacing components
. To order parts call 1-800-537-
SE-237 REPLACEMENT/REPAIR PARTS
1 20-0955 1†Ball Valve (Shown in Fig. 2)
NOTE: This unit should be connected to an uninterrupted source of potable water, with a minimum flowing
pressure of 20 PSI and a maximum static pressure of 125 PSI.
FLOW PRESSURE PSI (BAR) 20 (1.38) 60 (4.14)
FLOW RATE GPM (LPM) 20 (75) 25 (94)
P.O. Box 191, Wilmington, DE 19899-0191 USA
1-(***)-537-2107, Fax: 1-(***)-977-2747
Note: All units meet existing ANSI Z358.1 1998 Standards and OSHA Rules. Product improvements may cause specification and dimensional changes without notice.
Contact: paul-valentine@rockford-industrial.com (Paul Valentine)